Flat-pack kitchen cabinets can look simple in their boxes. The challenge begins when dozens of panels, cam locks, hinges, and screws cover the floor. How to assemble flat-pack kitchen cabinets efficiently? Start with a clear work area, the manufacturer’s instructions, and enough time to check every part. A missing back panel is easier to spot before the cabinet takes shape.
Cabinetmaking educator Andy Rae is known for practical woodworking guidance. A useful paraphrase of that approach is: “Check the fit before you commit to the fastener.” This is not a verbatim quotation. It captures a reliable assembly habit: dry-fit pieces, confirm their orientation, and tighten hardware only when the joints sit correctly. Keep a small bowl for connectors and a soft cloth nearby. These simple details prevent a lot of searching and surface damage.
This guide’s outline will cover sorting components, preparing tools, assembling cabinet boxes, and fitting doors and drawers. It will also explain how to keep units square, protect finished surfaces, and avoid overtightening screws. Small mistakes happen. A panel may face the wrong way, or a hinge may need adjustment. Pause, check the diagram, and correct the issue before joining cabinets together. Instructions can be unclear, and not every kitchen floor is level. That deserves a second look. Use the cabinet maker’s measurements and fixing guidance, and ask a qualified installer when wall conditions or heavy units raise safety concerns. Efficient work is not rushed work; it is careful assembly with fewer avoidable pauses.
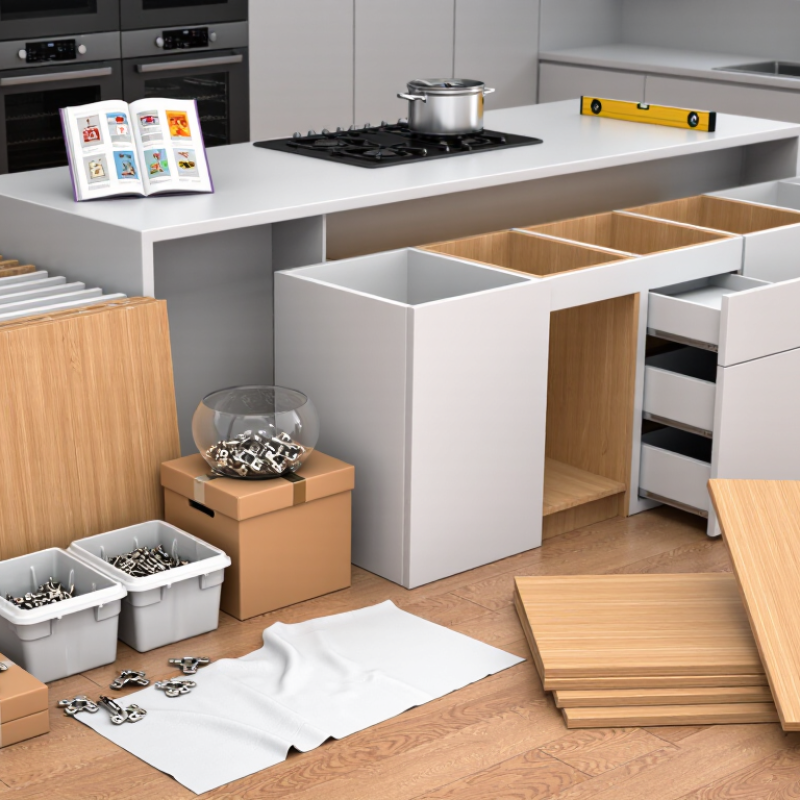
Before opening the first panel, clear a clean, level work area. Keep the manufacturer’s parts list beside you. I usually sort panels by cabinet number, then compare each piece with its printed code, dimensions, and edge finish. Do not rely on appearance alone. Two side panels may look identical but have different hinge holes. Check every shelf, door, rail, screw, cam, dowel, bracket, and adjustment plate. Count small hardware in a tray. Missing one connector can stop the entire assembly.
I once began building before checking the hardware bag. One short screw caused unnecessary delays. That mistake changed my routine. I now mark each verified item with a pencil on a separate checklist. Inspect panels under bright light. Look for chipped corners, swollen edges, warped boards, or misaligned pre-drilled holes. Photograph damaged parts before assembly, and contact the supplier using the part code. Guessing rarely saves time.
Tips: Use small containers for hardware. Keep similar screws apart. Match every bag to the parts list. Measure twice. If the list seems unclear, pause and request written clarification. A quick inventory may feel slow, but it prevents dismantling finished cabinets. Still, check your own counting carefully; rushed verification can create false confidence. Keep the work area dry and protect finished surfaces with cardboard.
A level work area determines whether flat pack kitchen cabinets assemble accurately. Uneven flooring can twist panels and misalign doors. Use a straightedge across the floor before opening the cabinet boxes. Check several directions, not just one wall.
My first cabinet assembly looked square until I measured the diagonals. They differed by nearly 6 millimeters. That small error affected the adjoining units. I now place a sturdy sheet over low spots and use adjustable shims. Keep a spirit level, tape measure, square, clamps, and a rubber mallet nearby. The work surface should also be clean, dry, and large enough to support each panel without overhang.
Typical base cabinets are 34.5 inches high before the countertop is installed. This measurement helps determine appliance clearances, filler positions, and the height of temporary supports. Do not assume every floor is ready for that dimension. Measure from the highest floor point, then mark a level reference line on the wall. Assemble cabinets upside down only when the instructions permit it. Otherwise, weight can stress cam fittings and thin back panels. I sometimes rush this stage, and that usually creates extra adjustment later. Tighten connectors firmly, but stop before crushing particleboard. Check each cabinet’s level from front to back and side to side before joining the next one.
A square cabinet begins with a genuinely flat work surface. Lay out the panels, cam fittings, screws, and backboard before assembly. Connect the side panels loosely, then place the top and base. Do not fully tighten the fixings yet. Measure both diagonals from corner to corner. They must match closely. A 2 mm difference across a 600 mm cabinet creates roughly 0.19 degrees of twist. That small error can multiply across a full kitchen run. Use a clamp, press opposite corners gently, and recheck both measurements. Confirm each corner with a reliable 90-degree square. Fit the back panel only after the cabinet body is aligned.
The 2023 U.S. Houzz Kitchen Trends Study reported that 73% of renovating homeowners upgraded their cabinets. That scale of replacement makes repeatable assembly accuracy important. The NKBA 2024 Kitchen Trends Report also identifies storage performance as a major planning priority. Uneven boxes waste that performance through rubbing doors, crooked drawers, and poor shelf alignment. ANSI/KCMA A161.1 also treats cabinet construction as measurable performance, not just appearance. My weak point is rushing the final screws. I sometimes assume the box stayed square. It did not.
Tips: Tighten fixings in stages. Measure again after each stage. Use thin shims under low corners. Keep the cabinet back from forcing the box out of square. Check the front opening after installation, too. Equal diagonals are helpful, but they are not everything. A cabinet can measure well and still rock on an uneven floor.
Flat-pack kitchen cabinets assemble efficiently when the 24-inch depth is treated as a working limit, not a rough suggestion. The NKBA Planning Guidelines identify 24 inches as the typical base-cabinet depth, excluding doors and drawer fronts. Measure from the finished wall to the cabinet front. Leave room for the door swing, countertop overhang, and plumbing connections. A six-millimeter error can become obvious across a long cabinet run.
Build each cabinet on a clean, level floor. Install the back panel squarely before tightening every fastener. I have found that checking diagonals prevents shelves from sitting at a slight angle later. Secure adjustable shelf pins fully, then test each shelf with a loaded hand. Doors should be installed after the cabinets are leveled and joined. This keeps hinge adjustment simpler. It is tempting to rush this part. That usually creates uneven gaps.
The 2024 Houzz & Home Study reports median kitchen renovation spending of 45,000 dollars for smaller kitchens and 75,000 dollars for larger ones. Careful cabinet assembly protects that investment, especially when replacement panels or hardware are difficult to match. Use a straightedge across neighboring fronts. Check the 24-inch cabinet depth again after installing backs and doors, because those parts add visible thickness. My own imperfect habit is measuring twice but tightening too early. Leave final tightening until the run is aligned.
Common nominal widths for base cabinets are shown below. Typical base cabinets are 24 inches deep, while the standard cabinet-box height is about 34.5 inches before the countertop is installed.
When assembling flat-pack units, install the back panel squarely before fitting shelves and doors. Confirm the cabinet width and the fixed 24-inch depth before positioning the units.
Flat-pack kitchen cabinets work best when the base is treated as one level system. I lay the cabinet parts near the installation wall and check each manual before tightening fasteners. The floor may look flat, but small dips can create large gaps across several units. A long level, tape measure, drill, clamps, and composite shims make the process more controlled.
Set the first cabinet carefully, then adjust its feet or shims until the front and side edges are level. I check this point twice. Place the next cabinet beside it, clamp the face frames, and align the top edges before joining them. Use the supplied joining hardware or suitable screws, and drill pilot holes to prevent splitting. Keep doors and drawers off during alignment; they can hide a crooked cabinet. I once trusted the countertop line instead of the cabinet level, and correcting that mistake took much longer.
After the cabinet run is level and joined, locate the wall studs with a stud finder and confirm their positions with a small test hole. Studs are often 16 inches apart on center, but older walls and remodeled spaces may differ. Mark each center on the cabinet rail. Check for hidden plumbing and electrical lines before drilling. Drive the specified cabinet screws into the studs, using washers when required, and avoid relying on drywall anchors alone. Leave no unsupported corner. If the wall bows, use firm shims behind the rail rather than pulling the cabinet tight and distorting its box. The wall may be imperfect. Your measurements should not be.
Uneven flooring can twist panels and misalign doors. Check several directions with a straightedge before unpacking.
Keep a spirit level, tape measure, square, clamps, and rubber mallet nearby. A clean, dry work surface helps, too.
Measure both corner-to-corner diagonals. They should match closely. Check each corner with a square.
Tighten them in stages, checking alignment between each stage. Stop before the fittings crush the particleboard. I have rushed this before.
Fit it after the cabinet body is aligned. A back panel can push the box out of square if fitted too early.
Base cabinets are typically 34.5 inches high before the countertop. Use this measurement when planning clearances and temporary supports.
Use a sturdy sheet or thin shims to support the cabinet. Recheck level from front to back and side to side.
Yes. Equal diagonals do not prove the cabinet sits flat. Check for rocking after installation. I sometimes forget this.
How to assemble flat-pack kitchen cabinets efficiently? Start by checking every panel and piece of hardware against the manufacturer’s parts list, then clear and level a roomy work area. Assemble one cabinet at a time, following the supplied instructions and keeping the pieces organized. As you join the panels, check that the cabinet is square by comparing its diagonal measurements and confirming that the corners meet at 90 degrees. Secure the back and fit the shelves and doors once the main frame is stable.
Keep typical dimensions in mind as you plan the installation: base cabinets are usually 34.5 inches high and 24 inches deep. After assembly, position the cabinets, level them, and join neighboring units together. Finally, anchor them securely to wall studs, which are often spaced 16 inches apart, while checking alignment throughout the process.
Ramsey Furniture