When comparing aluminum furniture suppliers in China, a bright weld is only the first clue. The real question is: “How to identify high-quality aluminum welding in furniture?” Look closely at joints where legs meet frames, corners carry weight, and thin tubes connect. A sound weld should show consistent fusion and a steady profile, without visible cracks, open pores, sharp undercut, or excessive spatter. Smoothness matters, but it is not proof. A polished seam can still hide weak penetration.
Welding metallurgy expert John C. Lippold’s published work offers a useful principle, paraphrased here: judge a weld by the integrity of the joint, not appearance alone. That distinction matters in furniture. A chair may look flawless under showroom lights, then loosen after repeated loading. Ask the manufacturer how welds are inspected, whether production samples receive strength checks, and how defects are recorded. Request close-up photographs of actual production joints, not only staged product images. Small details count.
A simple visual review is useful, but limited. That is easy to forget. For higher confidence, compare weld consistency across several pieces and ask for relevant inspection records or sample testing. Check both sides of accessible joints; uneven heat marks or sudden changes in bead width deserve questions, not instant conclusions. I would not reject every darkened area, either. Aluminum’s finish and cleaning process can affect its appearance. A careful buyer combines visible evidence, clear supplier answers, and practical testing before trusting a furniture weld.
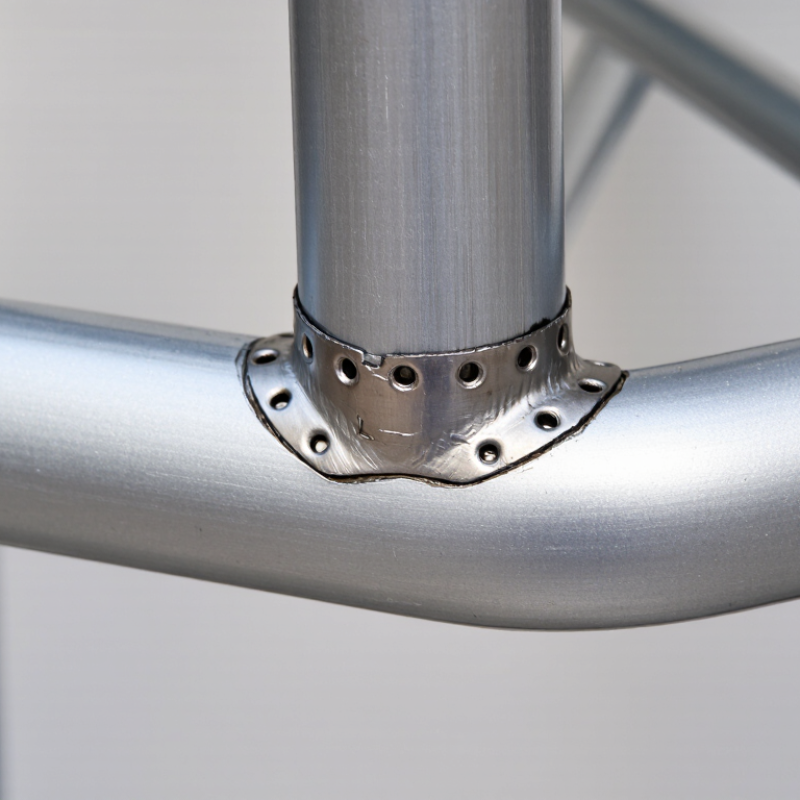
China Best How to Check Aluminum Furniture Weld Quality?
Key Criteria for Aluminum Furniture Weld Quality
A reliable check starts with the joint, not the shine. Look for continuous welds, even bead width, and smooth transitions into the aluminum tube or frame. Watch for visible cracks, pinholes, undercut edges, and unfilled craters, especially at corners and around seat supports. These can signal poor fusion or inconsistent heat control. A neat surface helps, but it does not prove the joint is sound. That distinction matters.
ISO 10042:2018 defines three quality levels—B, C, and D—for imperfections in arc-welded aluminum joints. The specified level should match the product’s use; it is not a universal furniture pass mark. AWS D1.2/D1.2M also provides workmanship and inspection guidance for structural aluminum welding. Compare each joint with the drawing, checking weld length, location, and size using a gauge where accessible. For higher-risk frames, dye penetrant testing can reveal surface-breaking cracks, while it cannot detect every internal flaw. A sample load test may expose weak joints, but one successful test is limited evidence. I would still record defects by location and recheck repaired areas; visual inspection alone is easy to overtrust.
| Inspection Criterion | How to Check | Good Quality Indicator | Warning Signs | Useful Tools |
|---|---|---|---|---|
| Cracks | Inspect the entire weld and adjacent heat-affected area under good lighting. Use a magnifier when needed. | No visible cracks in the weld or nearby material. | Any visible crack; cracks should be assessed and handled under the applicable specification. | Bright light, magnifier |
| Weld continuity | Trace the full joint, paying extra attention to corners, intersections, and ends. | The weld follows the specified length and location, with no unintended gaps or missed sections. | Unwelded sections, abrupt interruptions, or incomplete joints where a continuous weld is specified. | Visual inspection, drawing or weld map |
| Weld size and leg length | Measure fillet welds at representative points and at locations identified in the inspection plan. | Measurements meet the dimensions shown on the approved drawing or weld specification. | Undersized or inconsistent welds, or dimensions that do not meet the specified requirements. | Fillet weld gauge, caliper |
| Weld profile and uniformity | View the weld from multiple angles and compare its profile along the joint. | A reasonably even profile that blends with the joint as specified, without sharp or unintended irregularities. | Excessive convexity or concavity, overlap, sharp notches, or pronounced unevenness. | Visual inspection, weld profile gauge |
| Porosity | Check the weld surface for open pores. Where required, use an approved nondestructive examination method. | Porosity, if present, remains within the limits set by the applicable acceptance criteria. | Open pores, clustered pores, or pore size and distribution exceeding specified limits. | Bright light, magnifier; approved NDE method if specified |
| Undercut and edge condition | Inspect along the weld toes, where the weld meets the parent material. | No undercut beyond the permitted limits; edges are free of sharp, damaging transitions. | Visible grooves beside the weld or sharp notches that exceed the drawing or standard limits. | Visual inspection, weld gauge |
| Burn-through and distortion | Inspect the reverse side where accessible and check the frame or assembly against its dimensions. | No unintended holes or severe local damage; the assembly remains within specified dimensional tolerances. | Burn-through, excessive heat damage, or distortion that affects fit, function, or specified dimensions. | Visual inspection, tape measure, straightedge, square |
| Surface preparation and cleanliness | Check the weld and nearby area for residue, spatter, or contamination that could affect finishing or service. | The area is clean enough for the specified finishing process and intended use. | Residue, sharp spatter, or contamination that interferes with coating, assembly, or safe handling. | Visual inspection, clean cloth |
| Joint fit-up and alignment | Compare the assembled parts with the drawing and inspect for excessive gaps or mismatch at the joint. | Parts align and fit within the specified tolerances before and after welding. | Misalignment or gaps that result in an incomplete joint or prevent correct assembly. | Drawing, caliper, square, feeler gauge |
| Load-bearing performance | When required, verify the finished product using the documented test method and acceptance criteria. | Test results meet the requirements for the furniture design and intended service. | Cracking, separation, or permanent deformation that exceeds the specified test limits. | Approved load-test setup and inspection records |
Inspection note: Acceptance limits vary by product design, drawing, service conditions, and applicable welding or product standards. Use the approved specification for final acceptance; visual inspection alone cannot confirm internal weld quality.
Look for continuous beads, even width, and smooth transitions. Check corners and seat supports for cracks, pinholes, undercut edges, or unfilled craters. A neat surface helps, but proves little.
No. Surface appearance cannot confirm sound fusion inside the joint. I still find this easy to overtrust.
Place the tubes on a flat bench before welding. Check whether the ends meet without force, and use a feeler gauge to note any root gap. Remove clamps before checking again.
Measure the frame’s width, height, and diagonals before and after welding. Matching diagonal readings can indicate a square frame. Keep the same reference points each time.
Compare several joints under the same lighting and viewing angle. Check bead shape, weld length, and visible undercut. One attractive sample is not enough.
A controlled test on a representative piece may reveal cracking, permanent bending, loose joints, or unusual movement. Increase the load gradually and stop if the frame shifts.
No. A gentle push may expose looseness, but it cannot replace a measured test with suitable equipment. Sound alone is unreliable.
Note each defect’s location, measurements, and any repair. Recheck repaired areas. Human judgment varies, and repeated small fit problems are easy to miss.
How to identify high-quality aluminum welding in furniture? Begin by checking the weld’s appearance: sound welds should be reasonably uniform, smooth, and free from visible cracks, holes, excessive spatter, or incomplete areas. Then examine how the parts meet. Joints should align correctly, dimensions should be consistent, and welds should be positioned evenly across comparable pieces. These details can reveal whether the furniture was assembled with care and whether the finished structure is likely to fit together properly.
Visual checks alone are not enough. Where appropriate, test the frame for stability and look for loose joints, unusual movement, or signs that the welds cannot support normal use. A reliable manufacturer should also maintain clear quality-control procedures and inspection records, including checks performed during production and on finished products. Considering appearance, fit, strength, and documented inspections together provides a more complete assessment of aluminum furniture weld quality.

 Ramsey Furniture